What is Processor Power State?
Performance States, also called P-states, are a combination of frequency of the processor, volage, and a few more things. It allows Windows 10 to match with the performance requirement or when there is a need. That said, when you change the maximum processor state percentage, let’s say 50%, it does not mean the processor will run at 50% clock speed. What windows does here is that it chooses to reduce one of the factors it uses to calculate the P-States. So it is possible that if you drop by 50%, then it will only after by 30%.
Change Processor Power State when on Battery using PowerCFG
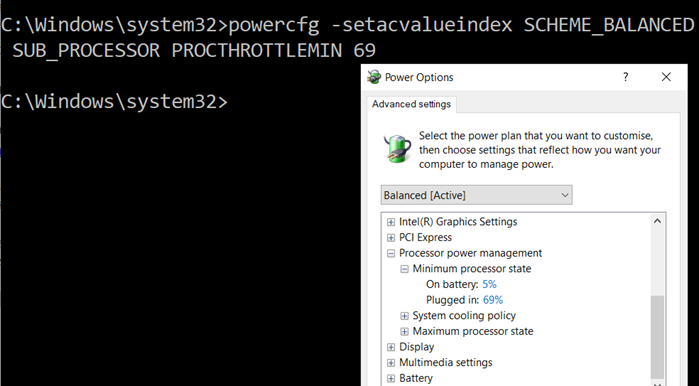
Now that you know about the P-State and the Power State, here is how you can quickly change them through the powercfg command line in Windows 10. This can be done on an elevated Command Prompt or Power Shell. Type cmd in the Run prompt (Win +R) and use Ctrl + Shift to open it with admin privileges. Type and enter the command: It will list down all the power plans on your computer. On my computer, I have three— Next, we run the following commands. The first one is to change the Processor Power State percentage in the balanced plan during power. This second is when it’s on battery.
Change SCHEME_BALANCED with SCHEME_MIN or SCHEME_MAX as per your need.Replace X with a number between 0 to 100.
How to add Maximum and Minimum Power State
In case you do not see the power state, you can add or remove using these commands.
Maximum Power State
Minimum Power State
While you can make the change even when the machine is plugged in, it only makes sense to do so when you are on the battery. This post will show you how to hide the Minimum and the Maximum Processor States. Read next: How to configure hidden Power Options in Windows 10.